Image Map

Friday, November 21, 2014

Bathroom Remodel Progress


  1. Demolishing our ugly bathroom was swift and quick! It was strange to see the bathroom gutted and no tub, vanity, closet, toilet.
Day 1 was demolishing. Day 2 was framing out the new tub/closet area and installing the cement board around the tub.

By Day 3 I was getting antsy. It seems we have had a parade of different people in and out of the house by now. My dog goes absolutely crazy when someone comes. So, by Day 3 I am sick of the barking dog.

Day 4 was a cold, cold day so the tile installers took the day off. Day 5-6 was..the weekend. No barking dog, but no progress either.

This week the real action began. The tub was placed and the tile around the shower was installed up to the mosaic glass tile. It had to set overnight due to the weight of the tile that would be installed above the strips of glass tiles. The floor cement board is of a thinner variety so the tile on the floor was down also! I am beginning to see progress!

The next day the tile installers finished the tile above the mosaic strip and grouted the floor. The vanity and toilet were also installed on that day.


The next day the grouting was finished and the plumbing was reattached. We still aren't able to use the bathroom yet. We still have the ever ending parade of mudding, letting it dry overnight, remudding, closet door install, etc.


Hopefully tomorrow will finish the REMODEL! I anticipate caulking and painting. I haven't heard which of the crew will be installing the shelves in the closet but I can wait on that. I will be able to move my things back into the bath, shower, wash my hair, etc. I use this bathroom and my spouse uses the one off the bedroom. It helps not to disturb him because I awake before him.

The one disappointment in the project is that the room size didn't grow. It is still the same size! But it looks so much better!

Pictures of a finished project soon!


post signature

Tuesday, November 11, 2014

Bath Remodel

Tomorrow is the day I've been dreaming of!  Gut the bathroom day! Can I get an AMEN?

Out comes the almond colored sink, toilet, fiberglass tub/shower combo!


 Out comes the "our first try at laying tile" floor. Out comes the 80's vanity.

I had already begun to strip the room of the decor. Gone is the mirror, pictures, shower curtain.


In goes everything "New".


I haven't decided on whether to use glass shower doors on the tub/shower combo or not. We are having a small linen closet enlarged but it doesn't allow room for a separate shower.

I am not sure of the paint color I want to go with either. I know it needs to be a light color. 

Tomorrow will be a "loud" day. My puppy doesn't like loud noises!


post signature

Friday, October 31, 2014

I needed a little inspiration...

This was my inspiration! The Yellow Cape Cod blogged about a makeover done by whitewashing brick. I debated about whether I could do it.

You see I am impatient! If I start a project I want it completed. I searched the internet for directions and got several lots of different techniques. The type of paint ended up being confusing also. I finally decided I could do it. And did. It was a quick makeover. 


And my next inspiration came from Rhoda over at Southern Hospitality. Oh her house renovation has been so exciting to watch over the last two years. 
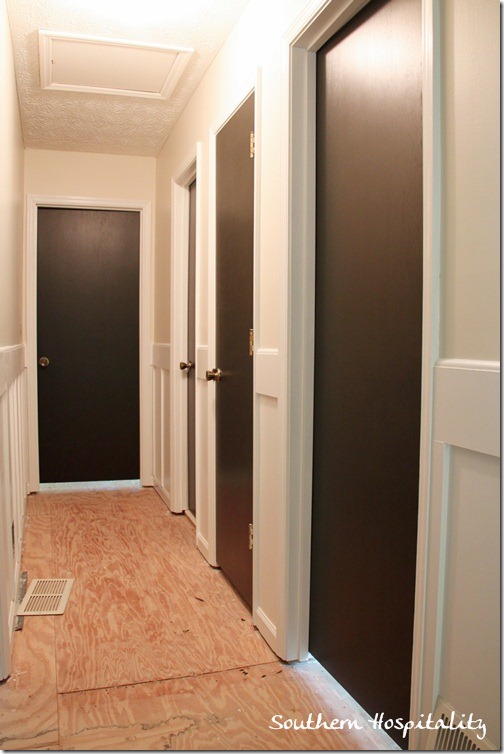
black doors hallway

040


This is how she added trim to her hallway. My house is a 79 split entry also, Back in the day when long hallways led to the bedrooms and baths. This picture shows her trim before the hardwood floors. 
My hallway already had a chair rail that I added several years ago. Since it was too low for board and batten I decided to go with the picture frame moldings. One short afternoon project for me since I did the cutting and nailing via the trusty nail gun. Mr. Spouse did the chalking and I touched up the paint. (I painted with semi-gloss in ultra white prior to adding the boxes. 


All in all, these are two transformations that have made me smile! And they are inspired from others!


post signature

Wednesday, October 15, 2014

Annie Sloan Graphite Try

I know. Chalk paint isn't new. It has been raved about. I have pinterested it. And googled it. Read directions. Watched youtube videos.

I think I can. I want to try. Take a few deep breaths.

First thing is to decide on a color. Since the piece I am doing is in the kitchen it needs to blend in with the cabinets and granite counter tops.

I decided on graphite--- a dark gray as in pencil lead. I read and decided this after reaching this as my inspiration.


I wanted a dark contrast in the cabinet with my white stoneware. I purchased this cabinet from JCPenney several years ago. It was on closeout and was about $50. The odd part was that the top two shelves had a back and the bottom shelf didn't.

 I purchased the thinest panel Lowe's had and let them cut it to size.
 I attached it to the back before I began painting.
 As you can tell, it was really odd looking with that open space.
I found out that I need to learn a bit more about chalk painting. But I love the fact that it is a doable project in one day. With other finishes the drying time between coats seems to take forever. And I.do.not.like the mess during projects. (Neither does my dog--he pouted all day!) I put the first coat on and let it dry for about a hour while I took a break. I put the second coat on. About a hour later I put the first coat of clear wax. I buffed it and applied a second coat of wax a few hours later. By the end of the day I buffed it again and placed everything back!


I will definitely use chalk paint again. A couple of things I would do next time is use a really good brush and realize that I should thin the paint with a little water if I want an overall finish with little distressing.


post signature